




How to remove a sheet metal bracket without damaging it?
 Sep 22, 2025|
Removing a sheet metal bracket without causing any damage is a skill that can save you time, money, and resources. As a seasoned sheet metal bracket supplier, I've witnessed firsthand the importance of proper removal techniques. In this blog post, I'll share some valuable insights and practical tips to help you achieve a successful removal process.
Understanding the Importance of Non - Damaging Removal
Before delving into the removal process, it's essential to understand why non - damaging removal matters. Sheet metal brackets, such as the ones we offer at our supply Sheet Metal Bracket, are often used in various applications, including construction, automotive, and household fixtures. These brackets are designed to provide support and stability, and damaging them during removal can render them useless for future use. Reusing undamaged brackets not only saves on material costs but also contributes to environmental sustainability by reducing waste.
Tools Required for the Removal
To remove a sheet metal bracket without damage, you'll need the right tools. Here are some essential tools that I recommend:
- Screwdrivers: Flat - head and Phillips - head screwdrivers are commonly used to remove screws that secure the bracket. Make sure to choose the appropriate size to avoid stripping the screw heads.
- Pliers: Needle - nose pliers or slip - joint pliers can be used to grip and remove small fasteners, such as nails or staples. They can also be helpful in bending or straightening small parts during the removal process.
- Wrenches: For brackets secured with nuts and bolts, an adjustable wrench or socket wrench set is necessary. Ensure that the wrench fits the nut or bolt snugly to prevent rounding off the edges.
- Hammer and Punch: A hammer and punch can be used to gently tap out rivets if the bracket is riveted in place. However, this should be done with caution to avoid denting or warping the bracket.
- Putty Knife or Pry Bar: These tools can be used to gently pry the bracket away from the surface it's attached to. Choose a putty knife or pry bar with a flat, smooth edge to minimize the risk of scratching or damaging the bracket or the surrounding surface.
Step - by - Step Removal Process
Step 1: Inspect the Bracket and its Attachment
Before you start removing the bracket, take a close look at how it's attached to the surface. Identify the type of fasteners used, such as screws, nails, rivets, or welding. Note the location and number of fasteners, as well as any other components that may need to be removed first. For example, if the bracket is part of a larger assembly, you may need to remove other parts to access it.
Step 2: Remove the Fasteners
- Screws: Use the appropriate screwdriver to loosen and remove the screws. If the screws are rusted or stuck, you can apply a penetrating oil, such as WD - 40, and let it sit for a few minutes to loosen the rust. Then, try turning the screw again. If the screw head is stripped, you may need to use a screw extractor tool.
- Nails and Staples: Use pliers to grip the nail or staple and pull it out. If the nail or staple is deeply embedded, you can use a hammer and punch to drive it out from the opposite side.
- Rivets: If the bracket is riveted in place, use a hammer and punch to remove the rivets. Place the punch on the center of the rivet head and tap it gently with the hammer until the rivet head pops off. Then, use a drill to remove the remaining part of the rivet. Make sure to drill at the correct size to avoid damaging the bracket.
- Welded Brackets: Removing a welded bracket is more challenging and may require specialized tools, such as a grinder or a cutting torch. If you're not experienced with these tools, it's best to seek professional help.
Step 3: Pry the Bracket Away
Once all the fasteners are removed, use a putty knife or pry bar to gently pry the bracket away from the surface. Start at one end of the bracket and work your way along, applying even pressure. Be careful not to apply too much force, as this can cause the bracket to bend or warp. If the bracket is stuck, you can try applying a small amount of lubricant, such as silicone spray, to help it slide off.
Step 4: Clean and Inspect the Bracket
After removing the bracket, clean it thoroughly to remove any dirt, debris, or rust. You can use a mild detergent and a soft brush to clean the bracket, then rinse it with water and dry it with a clean cloth. Inspect the bracket for any signs of damage, such as cracks, bends, or dents. If you find any damage, you may need to repair or replace the bracket.
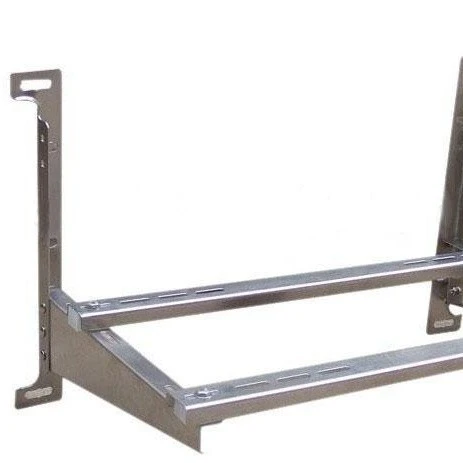

Special Considerations for Different Types of Sheet Metal Brackets
Hot - dip Galvanized Staircase Bracket
Hot - dip galvanized staircase brackets, like the ones we offer at Hot - dip Galvanized Staircase Bracket, are coated with a layer of zinc to protect them from corrosion. When removing these brackets, be careful not to scratch or damage the galvanized coating, as this can expose the underlying metal to rust. Use soft - edged tools and take extra care when prying the bracket away from the surface.
Stainless Steel Supports for Air Conditioners
Stainless steel supports for air conditioners, such as those available at Stainless Steel Supports for Air Conditioners, are known for their durability and resistance to corrosion. However, they can be prone to scratching. When removing these brackets, use non - abrasive tools and avoid using excessive force to prevent scratching the surface.
Troubleshooting Common Issues
- Stripped Screws: If the screw heads are stripped, try using a screw extractor tool. You can also try drilling a small hole in the center of the screw head and using a self - tapping screw to remove the stripped screw.
- Rusted Fasteners: As mentioned earlier, applying a penetrating oil can help loosen rusted fasteners. If the fasteners are severely rusted, you may need to cut them off using a hacksaw or a grinder.
- Bent or Warped Brackets: If the bracket is bent or warped during the removal process, you can try to straighten it using a vice and a hammer. However, if the damage is severe, it may be best to replace the bracket.
Conclusion
Removing a sheet metal bracket without damaging it requires patience, the right tools, and proper technique. By following the steps outlined in this blog post, you can ensure a successful removal process and preserve the integrity of the bracket for future use. As a sheet metal bracket supplier, we're committed to providing high - quality products and sharing our expertise with our customers. If you have any questions about sheet metal brackets or need assistance with your projects, please don't hesitate to contact us for procurement and further discussions.
References
- "Sheet Metal Fabrication Handbook" by David A. Madsen
- "Fasteners and Joining Handbook" by Peter H. Nissen